

Key Takeaways
Choosing an ABS sensor starts with confirming the vehicle and the exact wheel position, then checking that the replacement matches the system and original part.
- Confirm year, make, model, trim, engine, and VIN before ordering.
- Match the sensor to the correct wheel and axle position.
- Compare signal type, connector, dimensions, and cable routing.
- Diagnose wiring and encoder or tone-ring issues before replacing a sensor.
- Check return terms, inspect the part, and verify the repair after installation.
Understand ABS sensor types and system design
ABS sensors report wheel-speed information to a vehicle’s braking control system. Their design varies, so appearance alone is not enough to identify a compatible replacement. Knowing how the sensor reads wheel rotation helps explain why the matching ring, hub, and signal type matter.
Passive and active sensors
Passive sensors generate a changing electrical signal as a toothed ring rotates past the sensor. Active sensors require power and send a different kind of signal, so the two types are not interchangeable just because their housings look alike. The vehicle’s service information or the original sensor is the best starting point for identifying which design it uses.
A warning light does not, by itself, prove that the sensor has failed. For a general overview of the steps involved in identifying a possible fault, see this ABS sensor diagnosis guide. Use diagnostic information and vehicle-specific service procedures to confirm the cause before ordering a part.
Magnetic encoder rings and tone rings
A sensor may read a toothed tone ring or a magnetic encoder built into a bearing or hub. Damage, corrosion, contamination, or an incorrect air gap can affect the reading even when the sensor itself is serviceable. The ring’s design must match the sensor and the vehicle’s system; a visually similar replacement ring can still be wrong.
If the sensor reads an integrated magnetic encoder, its orientation and condition matter during service. This is one reason to inspect the surrounding hub or bearing rather than treating the sensor as an isolated part. A careful diagnosis can prevent replacing a good sensor when the actual problem is at the signal source.
Sensors integrated into wheel hub assemblies
Some vehicles use a separate sensor, while others incorporate the sensing element into a wheel hub or bearing assembly. In the latter case, the correct repair may involve an assembly rather than a small standalone sensor. Check the parts catalogue and repair instructions for the specific vehicle before assuming the sensor is sold separately.
This difference can affect both the part search and the installation work. Confirm which components are included in the listing, and compare them with the existing setup. If the sensor is part of a hub assembly, replacing only a sensor-shaped component may not be possible or appropriate.
Confirm fitment for your vehicle
Fitment is the first practical filter when deciding how to choose right abs sensor for car. A part can look nearly identical yet differ in connector, signal type, or mounting details. Start with reliable vehicle information, then use the original part and catalogue references to narrow the options.
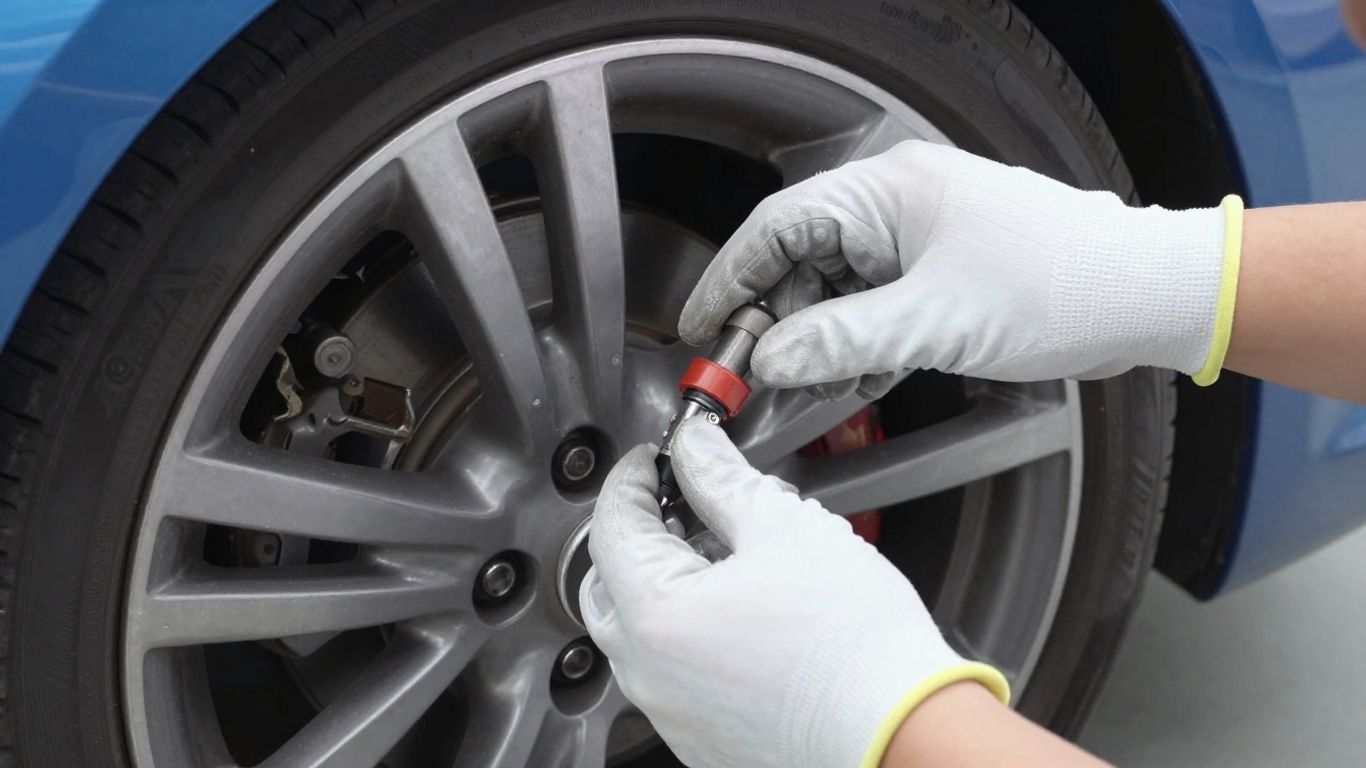
Check the year, make, model, trim, and engine
Enter the full vehicle details in a parts catalogue, including trim and engine where requested. Some applications change within the same model generation, and a broad make-and-model match may leave out a meaningful distinction. If the vehicle has multiple configurations, note any relevant production date or braking-system option listed in its service records.
Treat a catalogue result as a candidate, not final confirmation. The vehicle details help narrow the search, while the original part number, connector, and wheel position help verify it. A listing should make the intended application clear enough to compare rather than relying on a generic product photo.
Use the VIN to verify catalog listings
A VIN can help a parts seller or catalogue distinguish between configurations that share a model name. Give the complete VIN to a parts professional when an application lookup is uncertain, and ask them to confirm the fitment details rather than simply repeating the vehicle description. This is especially useful when a listing divides applications by production date or equipment package.
Use the VIN as one check alongside the old part and the vehicle’s service information. A catalogue entry may still need clarification, so record the result and compare it with the component you are replacing. For other kinds of decisions, a trade school accreditation guide illustrates why checking the details behind a listing matters; here, the equivalent is confirming the exact vehicle application.
Cross-reference the original equipment part number
The original equipment number can provide a more precise reference than a broad vehicle search. Look for a number on the old sensor or consult the vehicle’s parts information, then compare it with the replacement listing. Some catalogues show superseded numbers or compatible replacements, so ask the seller to confirm the relationship if the numbers differ.
A short comparison table can keep the important details together while you check a listing. These are the fields worth verifying before adding a part to your order:
| Fitment detail | What to compare | Why it matters |
|---|---|---|
| OE part number | Exact number or documented replacement | Helps distinguish application variants |
| Vehicle details | Year, model, trim, and engine | Narrows catalogue fitment |
| Wheel position | Front or rear, left or right | Sensor leads and mounts may differ |
| Connector | Shape, keying, and pin count | Prevents a plug mismatch |
If one field conflicts, pause and resolve it rather than relying on a partial match. For a different kind of product-selection question, the guide to titanium and surgical steel discusses checking material details; with an ABS sensor, the comparable discipline is matching the documented part specification to the car.
Compare connector shape and pin count
Inspect the original connector and compare its shape, keying, and number of pins with the replacement listing. A plug that appears close may not lock securely or make the correct electrical connection. Also check the connector’s orientation and any clips or brackets attached to the lead.
Photographs can help, but they may not show the connector from the angle needed to see its keying. Use the product description or request a clear image if the pin count or shape is unclear. The connector should match without forcing or modifying it.
Match the sensor to the correct wheel
The correct vehicle-wide fitment does not guarantee that a sensor suits every corner of the car. Wheel position can affect the lead length, mounting points, and connector route. Identify the fault location from reliable diagnostic information, then check the listing against that exact position.
Identify the exact wheel position
Confirm whether the required part is for the front or rear axle and for the left or right side. Diagnostic trouble codes can point toward a wheel circuit, but codes should be interpreted using the vehicle’s service procedure rather than treated as proof that a sensor itself has failed. When the location remains uncertain, a technician can test the circuit and inspect the sensor area.
Keep the position notation consistent: left and right are normally defined from the driver’s seated perspective, not while facing the vehicle. This small detail can prevent an order for the opposite side. A listing that only says “front sensor” may not provide enough information to choose confidently.
Check for front- and rear-axle differences
Front and rear sensors can use different brackets, leads, or connectors even on the same vehicle. Some models also vary by drivetrain or braking package. Check the catalogue application for the axle and configuration, then compare the replacement’s physical features with the part currently installed.
Do not assume that a matching sensor on one axle proves the other axle uses the same part. The routing and mounting environment can differ substantially. If the listing does not identify the axle clearly, ask for a precise fitment confirmation before purchase.
Compare cable length and routing
The cable must reach the connector while following its original path and retaining its clips. A lead that is too short can pull tight as the suspension or steering moves; excess length can snag or rub if it is routed incorrectly. Compare the replacement with the old sensor and note where the clips and retainers sit.
Routing is not a cosmetic detail. Keep the cable away from moving parts and hot or abrasive surfaces, following the vehicle’s prescribed path. A correct sensor with poorly managed wiring can create a new fault or suffer damage soon after installation.
Verify left- and right-side fitment
Left- and right-side parts may be mirrored, use different lead lengths, or have connectors oriented differently. Check the part number and listing notes for the side, and compare the mounting shape with the removed component. If the original side cannot be identified confidently, confirm the position through service information before ordering.
Part descriptions sometimes use driver-side and passenger-side terms, which can vary by market. Prefer explicit left/right fitment or the manufacturer’s vehicle-specific catalogue data. This avoids an ambiguous description becoming the deciding factor.
Compare technical specifications
Once the vehicle and wheel position are established, compare the technical details that determine whether the sensor can work with the ABS system. A suitable replacement must match more than its outer shape. The specifications, mounting details, and model-year application should agree with reliable vehicle information.
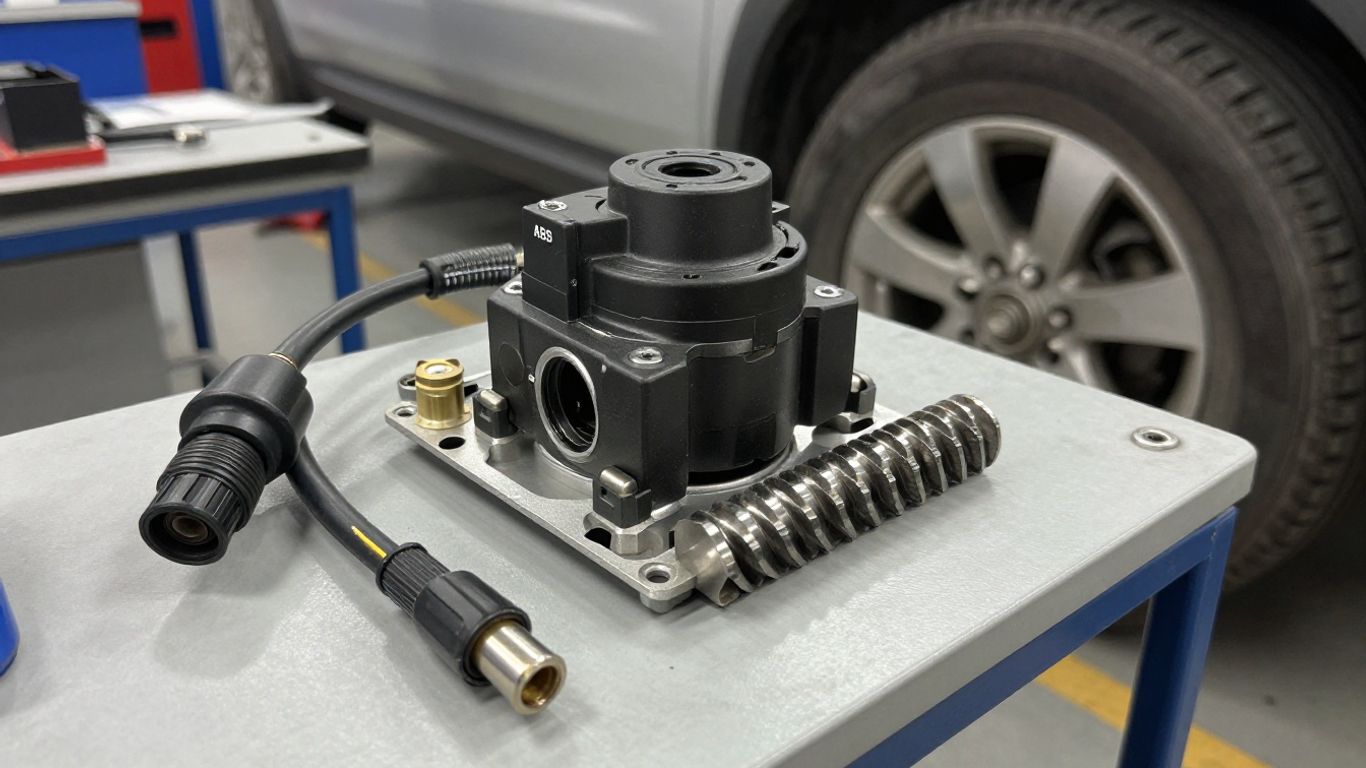
Match the sensor’s signal type to the ABS system
Check whether the system uses a passive or active sensor and verify that the replacement is specified for that system. Their electrical behavior differs, so a connector that fits does not guarantee compatible operation. If the listing leaves the signal type unclear, consult the vehicle’s service information or ask a qualified parts specialist to confirm it.
Avoid inferring signal type from wire count alone unless the vehicle documentation supports that conclusion. Manufacturers can use different arrangements, and an assumption based on appearance may lead to a wrong part. Signal compatibility comes first; dimensions and price only matter after the basic electrical match is established.
Check mounting style and physical dimensions
Compare the mounting point, bolt or clip arrangement, sensor body shape, and any sealing surface. The sensing face must sit in the intended position relative to the ring or encoder, so small differences can matter. Where dimensions are published, compare them with the original part and the vehicle-specific specification.
Look for included brackets or fasteners, but do not assume they replace vehicle-specific hardware. If the sensor’s body or mounting method differs from the removed part, stop and verify the application. A near match is not a safe substitute for confirmed compatibility.
Confirm compatibility with traction control and stability control
Wheel-speed signals may also be used by traction control or stability control, depending on the vehicle’s system design. Confirm that the replacement is listed for the vehicle’s complete braking and control configuration, not merely described as a generic ABS sensor. The relevant vehicle documentation can clarify which systems share the wheel-speed signal.
After installation, warning indicators or stored faults may remain until the system is checked and any required reset or drive procedure is completed. Follow the service instructions for that vehicle rather than assuming that the ABS light will clear on its own. A correct part is one element of a system-level repair.
Look for differences between model-year versions
A model name can span several years with changes to wiring, connectors, hubs, or control systems. Use the production date or VIN-specific catalogue information where a listing splits model-year applications. When two parts are shown for adjacent years, compare part numbers and specifications rather than choosing the newer-looking option.
This kind of change is not always visible in a product photograph. Confirm the application with a parts professional if catalogue notes are incomplete, and keep the old component available for a side-by-side check. A few minutes of verification is easier than discovering the mismatch after the car is apart.
Evaluate quality and diagnose the fault
A replacement decision should follow diagnosis, not replace it. Sensor wiring, connectors, tone rings, and magnetic encoders can all affect wheel-speed readings. Once the cause is clearer, compare parts on specification, construction, support, and the seller’s ability to verify fitment.
Compare OEM and aftermarket options
An original equipment part and an aftermarket replacement can both be appropriate when the application and specifications are confirmed. Compare the documented fitment, signal type, included components, warranty, and return terms rather than treating the label alone as a quality guarantee. A parts supplier’s ability to check an application can be useful when catalogue details are incomplete.
A car-parts supplier network can help customers search across used, genuine, and aftermarket parts, but the actual listing still needs to match the vehicle. Ask what condition the part is in and whether the number is new, used, or superseded. The goal is a verified fit, not simply the lowest or most familiar label.
Check sealing, cable protection, and connector quality
Inspect the sensor body for damage and check that seals, grommets, and connector locks are present and correctly formed. The cable insulation should be intact, with no cuts, crushed sections, or exposed conductors. These visible details do not prove the part’s internal performance, but they can reveal obvious shipping or manufacturing concerns.
If buying a used component, request clear photographs of the sensor, cable, and connector and ask about its condition. A similar habit of checking what is included appears in home maintenance advice, including garage door safety checks, though an ABS sensor should always be judged by its own vehicle-specific requirements.
Review warranty terms and seller reputation
Read the warranty duration, exclusions, and return conditions before placing the order. Check whether the seller accepts returns if the part is unopened or if catalogue fitment proves incorrect, and clarify who handles return shipping. Keep order details and fitment confirmation in case you need to resolve a mismatch.
Seller feedback can help you judge communication and fulfilment, but it cannot establish that a specific sensor suits your vehicle. When considering a supplier, review its stated support for vehicle-part searches; Attic Fanatics, for example, describes a home-insulation service rather than automotive parts, so it is not a source for ABS fitment. Keep the decision tied to the sensor seller and the car’s verified specification.
Rule out wiring or tone-ring problems before replacing the sensor
A fault code may identify a wheel-speed circuit without identifying the failed component. Inspect the connector and wiring for corrosion, loose connections, breaks, or rubbing, and examine the tone ring or encoder for damage where accessible. A professional diagnosis may be needed if the fault is intermittent or the sensor signal requires testing.
Before ordering, work through a few checks in a deliberate order:
- Confirm the trouble code and wheel location using the vehicle-specific procedure.
- Inspect the connector, cable, and mounting area for visible damage or contamination.
- Check the tone ring or encoder and related hub components where accessible.
- Verify the replacement number and specifications against the vehicle and original part.
These checks help distinguish a failed sensor from a fault elsewhere in the circuit or at the signal source. For a broad parts marketplace, car ABS sensor listings can be one place to review product information, but fitment and seller details still need individual verification.
Plan the purchase and installation
A little preparation makes the final purchase and repair more straightforward. Verify what the box includes, compare the new part with the original, and use the vehicle’s own instructions for removal and installation. Afterward, check the system rather than assuming the repair succeeded because the warning light changed.
Check the return policy and included hardware
Before ordering, confirm whether the price includes clips, brackets, seals, or fasteners needed for the specific application. Check the return window and conditions, especially if the part will be opened for comparison. Keep packaging and receipts until fitment and operation have been confirmed.
If a listing describes an included component vaguely, ask the seller to clarify before purchase. Do not count on reusing damaged hardware or adapting a part that does not fit. For a different type of service, a website development guide describes testing before launch; the useful parallel here is to check the details before the final step, not after installation has begun.
Inspect the new sensor against the original part
Before fitting, place the replacement beside the removed sensor and compare the part number, mounting point, lead length, connector, and sensor body. Check the cable and seals for damage from storage or shipping. If an important feature differs, pause and verify the part rather than forcing it into place.
A side-by-side comparison is a practical last check, not a substitute for catalogue confirmation. Some differences may be legitimate revisions, but those should be supported by a documented replacement number or fitment note. Keep the original component until the repair is complete.
Follow vehicle-specific installation instructions
Use the service procedure for the exact vehicle and follow any specified torque values, routing paths, and handling precautions. Avoid pulling on the lead or striking the sensor, and take care around the hub and encoder surface. If corrosion or a seized component makes removal difficult, use the prescribed method or seek professional help rather than risking damage.
Installation details vary by vehicle, especially where the sensor is part of a hub or bearing assembly. Do not apply a generic procedure to a configuration that calls for different steps. When the job involves brake or suspension components beyond your experience, having a qualified technician complete it is the safer choice.
Scan for codes and confirm the repair afterward
After installation, use a suitable scan tool and the vehicle’s service instructions to check for stored faults and verify the wheel-speed data where the procedure allows. Some systems need a reset or a specific test drive before the repair can be confirmed. Make sure warning lights and related system messages are addressed according to the manufacturer’s instructions.
If the code returns, do not assume the replacement part is automatically defective. Recheck the connector, cable routing, mounting, and encoder or tone ring, then diagnose the circuit again. A repair is complete when the underlying fault is resolved and the vehicle’s ABS-related systems pass the required checks.
Conclusion
Choosing the right ABS sensor is a process of matching the vehicle, wheel position, signal type, and physical details, then confirming that the original fault really points to the sensor. Verify the part before ordering, follow vehicle-specific installation guidance, and check the system afterward so the repair restores the intended function rather than just replacing a component.
Frequently Asked Questions
Can I choose an ABS sensor using only my car’s make and model?
Make and model are a useful start, but year, trim, engine, production date, VIN, and wheel position may also affect fitment. Confirm the original part number and connector before ordering.
Are ABS sensors interchangeable between the front and rear wheels?
Not always. Front and rear sensors can differ in cable length, mounting, connector, or application, so verify the axle and exact wheel position.
How can I tell whether an ABS sensor is active or passive?
Check the vehicle’s service information, parts catalogue, or original part specification. Appearance and wire count alone may not be sufficient to identify the sensor type reliably.
Does an ABS warning light always mean the sensor is bad?
No. Wiring, connectors, tone rings, magnetic encoders, or other system faults can produce related warnings. Diagnose the circuit and signal source before replacing a sensor.
Should I replace the tone ring with the sensor?
Only if inspection and vehicle-specific repair guidance indicate it is damaged or part of an assembly that must be replaced together. The ring and sensor designs need to be compatible.
Can I install an ABS sensor myself?
That depends on the vehicle, the condition of the components, and your experience. Follow the exact service procedure, and seek professional help if removal, wiring, or related brake and suspension work is uncertain.
What should I check after installing a replacement sensor?
Follow the vehicle’s procedure to scan for faults and confirm wheel-speed information if available. Check cable routing and warning indicators, and address any returning code with further diagnosis rather than assuming the sensor is at fault.