

Key Takeaways
Replacing an ABS sensor can be a manageable DIY repair when diagnosis and vehicle-specific instructions come first. Take your time, protect the wiring and hub, and verify the result before returning to normal driving.
- Confirm the fault with ABS-capable diagnostics rather than relying on the warning light alone.
- Check the sensor, wiring, tone ring, and bearing before ordering parts.
- Match the replacement to the exact vehicle and follow its repair procedure.
- Support the vehicle securely and avoid forcing a seized sensor.
- Clear the codes and confirm the repair with a safe test and wheel-speed data.
Understand the symptoms and confirm the sensor fault
An ABS warning light can point to a wheel-speed sensor, but it does not prove the sensor itself has failed. A damaged wire, corroded connector, problem with the tone ring, or wheel-bearing fault can produce similar symptoms. Before starting an abs sensor replacement diy, identify what the vehicle is reporting and inspect the whole circuit. If braking behavior changes or the vehicle feels unsafe, stop driving and arrange a professional inspection.
Recognize common signs of an ABS sensor problem
The ABS warning light is the clearest sign, and some vehicles may also display a stability-control or traction-control warning because those systems use wheel-speed information. You might notice the ABS activating unexpectedly at low speed, or not activating when it normally would during a controlled stop. These symptoms are clues, not a diagnosis: dashboard indicators and braking behavior vary by vehicle, so consult the owner’s manual and avoid testing the brakes in traffic.
Read ABS-specific diagnostic trouble codes
Use a scan tool that can access the ABS module; a basic engine-code reader may not show the information you need. Record the codes before clearing them, since the description can point to a circuit or wheel without proving which part has failed. A general ABS sensor replacement guide can help orient the repair sequence, but your vehicle’s service information should guide the diagnosis and specifications.
The code description helps frame the next checks, but it is only one piece of evidence. These examples show why a code should guide inspection rather than act as a parts order:
| Scan-tool result | What it may indicate | Useful next check |
|---|---|---|
| Wheel-speed sensor circuit fault | Sensor, connector, or wiring issue | Inspect the harness and connector |
| Signal missing or implausible | Sensor gap, damaged tone ring, or signal problem | Compare live data and inspect the wheel area |
| Intermittent wheel-speed fault | Loose connection or damaged wire | Check the harness along its full route |
Use the code to narrow the search, then verify the physical components and live readings before deciding what to replace.
Use live data to identify the affected wheel
With the vehicle safely stationary or operated as directed by the service information, view individual wheel-speed readings on a compatible scan tool. A reading that stays at zero or differs sharply from the others can help identify where to inspect, although scan-tool updates and vehicle conditions affect what you see. Do not raise or drive the vehicle just to collect data unless the service procedure specifically calls for it and you have the right equipment. A front-right sensor tutorial can illustrate one wheel-specific repair, but its details may not match your vehicle.
Rule out wiring, tone-ring, and bearing issues
Look for chafed insulation, stretched or pinched wiring, corrosion, a loose connector, and damage around the tone ring or encoder. A wheel bearing with excess play can affect the sensor signal, and some designs incorporate the magnetic encoder into the bearing or hub. A matching fault code alone is not proof that the sensor is the failed component. If visual inspection and live data do not agree, pause before replacing parts and seek a more complete diagnosis.
Identify the correct sensor and prepare the vehicle
The right replacement depends on more than the vehicle’s general model name. Year, trim, drivetrain, axle position, connector, and the vehicle’s particular braking system can all matter. Check the service information before ordering, and compare the replacement with the original part before fitting it. A little preparation here can prevent having the car apart with a sensor that does not fit.

Locate the faulty sensor using a repair manual
Use a repair manual or manufacturer service information to confirm the sensor’s location, connector access, harness clips, and removal procedure. The route may differ between front and rear wheels, and some vehicles require removing additional trim or components for access. Keep research specific to the repair: material about Dynamics 365 payroll, team-building events, construction contractors, face recognition cameras, or Ultimify GmbH does not establish vehicle-specific repair steps. When instructions conflict, use the procedure for your exact vehicle.
Match the replacement to the vehicle’s year, make, and model
Use the vehicle identification number or a parts lookup that accounts for the exact year, make, model, trim, and wheel position. Before installation, compare the old and new sensors: check the connector shape, wire length, mounting point, and sensor tip. A part that looks similar may still have a different connector or fitment, so do not modify it to make it fit.
Check whether the sensor is integrated with the hub assembly
Some vehicles use a sensor that can be replaced separately; on others, access or the sensor itself may be integrated with a hub or bearing assembly. Confirm this in the manual and parts information before disassembly. If the prescribed repair involves replacing the hub, or requires specialized tools you do not have, reassess whether the job is appropriate for a home repair.
Review model-specific procedures and safety precautions
Check whether the procedure calls for disconnecting the battery, removing a wheel-liner section, or taking other vehicle-specific steps. Note any fastener torque specifications and warnings about the brake or stability-control systems. Do not guess at a torque value or assume that a procedure for one axle applies to the other; the manual for your vehicle is the authority.
Gather tools and secure the vehicle
A safe setup matters as much as the part itself. You will typically need to remove a wheel, reach a small retaining fastener, release clips, and support the vehicle while you work. Gather everything before lifting the car, and make sure the tools suit the fasteners rather than forcing a poor fit. If you cannot support the vehicle securely, do not work underneath or around the wheel area.
Choose the right sockets and hand tools
Check the manual for the retaining-bolt size and any trim fasteners you may need to remove. A basic setup often includes a correctly sized socket and ratchet, suitable hand tools for the connector and clips, a wheel chock, and a jack stand rated for the vehicle. A scan tool capable of reading ABS codes is useful for diagnosis and verification. Avoid pulling on a connector with pliers or prying against the sensor with a sharp tool.
Prepare penetrating oil and a suitable cleaning brush
A small amount of penetrating oil may help with a corroded retaining fastener, but keep it away from friction surfaces and electrical contacts. A soft brush can remove loose dirt around the sensor mount without gouging nearby components. Avoid wire-brushing the sensor tip or tone ring, and do not spray cleaner into a connector unless the product and vehicle instructions allow it. Use only what is needed; contamination can create a new problem.
Park on level ground and chock the wheels
Park on firm, level ground, select Park or a gear as appropriate, and apply the parking brake as directed by the vehicle manual. Chock the wheels that will remain on the ground so the vehicle cannot roll. Before lifting, remove loose items and keep people clear of the work area. These four checks help establish a safer setup before the wheel comes off:
- Confirm the ground is level and firm.
- Secure the vehicle against rolling with wheel chocks.
- Loosen wheel fasteners as directed before lifting, if required.
- Keep the jack and stands within their rated capacity.
Once the vehicle is stable, follow the manual’s lift points and support procedure. A jack alone is not a safe support for a repair.
Lift and support the vehicle at approved points
Use the lift points specified in the owner’s or repair manual, and place a properly rated jack stand where the manufacturer permits. Raise the vehicle only enough to access the wheel, then confirm it is stable before removing the wheel or reaching into the wheel well. If the surface shifts, the stand cannot be positioned correctly, or the vehicle does not feel secure, lower it and stop until the setup can be corrected.
Remove the old ABS sensor
Access varies by vehicle, but the sensor is usually near the wheel hub and connected to a harness routed along the suspension or body. Follow the manual’s sequence so you do not strain the wire or damage nearby brake components. Take a moment to note how the original harness is clipped and routed; that makes it easier to restore the same safe path during installation.
Locate the sensor connector and release its lock
Trace the sensor wire to its electrical connector, using the manual if the connector is hidden behind a liner or bracket. Inspect the locking tab and release it as designed before separating the plug. Hold the connector body rather than pulling the wires, and avoid levering against a fragile housing. If corrosion or damage prevents a clean release, stop and address it without forcing the plug.
Free the wiring harness from its clips
Release each harness clip carefully and note its position and orientation. Some clips can be opened by hand; others need a small trim tool or the method described in the service procedure. Do not yank the wire free or let it hang under tension. A broken clip can leave the replacement harness exposed to movement or contact with the tire.
Remove the retaining bolt without damaging it
Clean dirt from around the retaining bolt so the tool can seat fully, then use the correctly sized socket or hand tool. If the bolt resists, apply penetrating oil sparingly and allow it time to work rather than rounding the head. Keep removed hardware organized, and check the manual before reusing a fastener that may be specified for replacement.
Work out a seized sensor without harming the hub or tone ring
Corrosion can bond a sensor into its bore. If it does not lift with gentle movement, do not hammer or lever against the tone ring, bearing seal, or hub face; a damaged mounting area can make a new sensor sit incorrectly. Use only the removal technique approved for the vehicle, and stop if the sensor begins to break apart or the surrounding metal is at risk. A stubborn or broken sensor is a sensible point to call a professional.
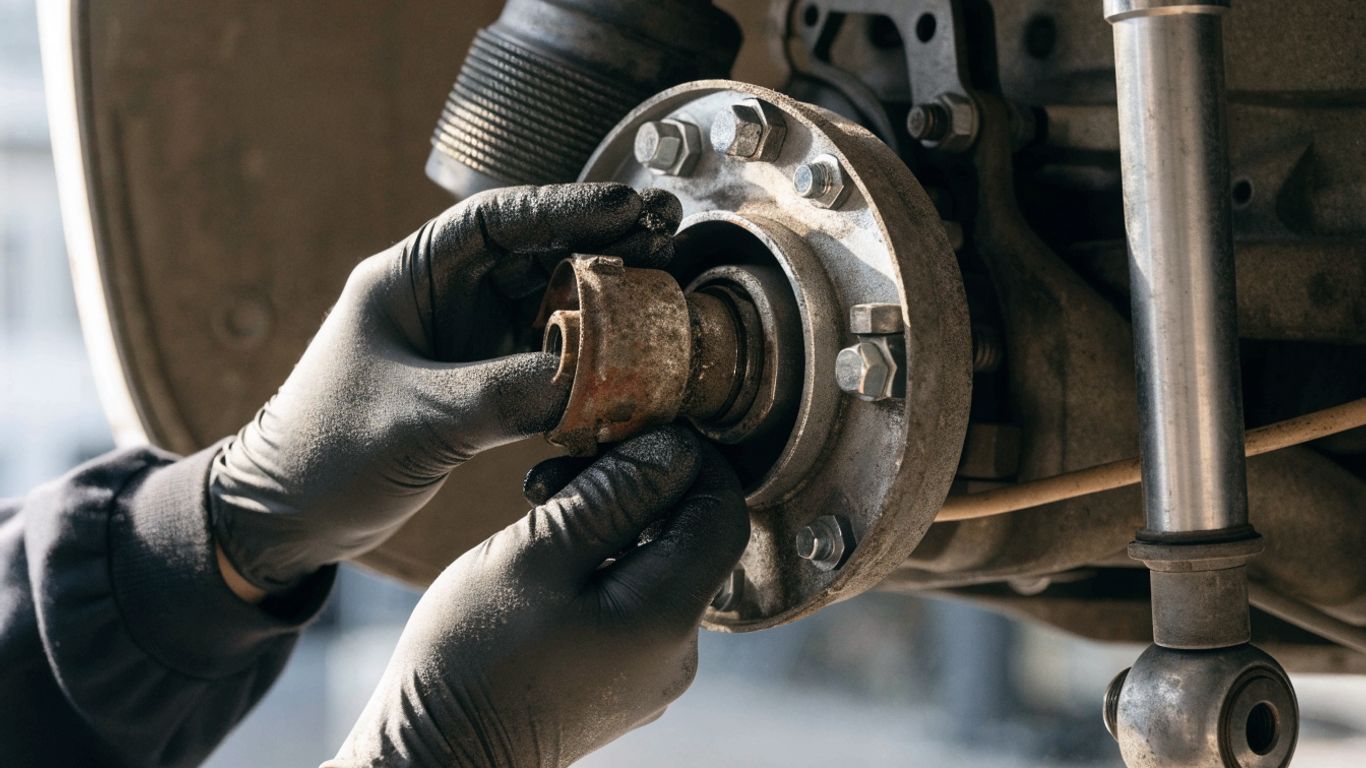
Install the replacement ABS sensor
Before installation, compare the replacement again with the original and confirm the connector and mounting points match. Keep dirt and debris out of the sensor bore, and use the vehicle’s specified procedure for seating and tightening it. The wire must follow its original route, away from the tire, axle, and other moving or hot parts. Work patiently; a pinched harness or sensor that is not fully seated can bring the warning back.
Clean the mounting surface and inspect nearby components
Remove loose debris from the mounting surface with a suitable brush, taking care not to scratch the bore or damage the tone ring. Inspect the connector, harness, hub area, and visible tone ring for signs of wear or impact. Do not use abrasives that remove material or alter the sensor’s seating surface. If you find damage that could explain the original fault, resolve that issue before fitting the replacement.
Seat the new sensor and tighten its fastener correctly
Position the sensor squarely and seat it as specified; do not force it into place or use the bolt to pull it down against resistance. Tighten the retaining fastener to the vehicle-specific specification using an appropriate tool. There is no universal torque value for every sensor and vehicle, so consult the repair manual rather than estimating. Check that the sensor sits flush where the design requires it.
Route and secure the wiring away from moving parts
Follow the original harness path and reinstall every clip and bracket in its proper position. Make sure the wire has enough slack for suspension movement without drooping into the wheel, axle, or brake components. Turn the steering as needed to confirm the harness remains clear through its range, following the vehicle’s prescribed checks. If a clip is broken, replace or repair it appropriately instead of leaving the wire loose.
Reconnect the plug and check the harness connection
Align the connector and press it together until its lock engages; do not force mismatched plugs. Check that the latch is secure and the connector is free of dirt or moisture. Give the harness a gentle visual check from the sensor to the connector, confirming it is not twisted, stretched, or trapped under a fastener. Refit any liner or covers removed for access.
Clear codes and verify the repair
Once everything is reassembled, use a scan tool that can communicate with the ABS module to clear stored codes as directed. A warning light going out is encouraging, but it does not replace a functional check or confirm that every fault has been resolved. Follow the vehicle’s prescribed startup and test procedure, and keep the first drive conservative. If a warning remains or braking behavior is abnormal, stop and investigate rather than assuming the repair is complete.
Clear stored ABS codes with a compatible scan tool
Reconnect the scan tool and follow its instructions to clear the relevant ABS codes. Some vehicles may need a key cycle or prescribed drive conditions before a status changes; consult the service information. If a code returns immediately, record it and review the circuit, sensor seating, and connector before clearing it again. Repeatedly erasing a returning fault does not fix its cause.
Confirm the warning light goes out after startup
Start the vehicle and watch the ABS indicator through its normal self-check. The exact sequence varies by model, so compare it with the owner’s manual. If the warning stays on or returns after moving, treat that as an unresolved fault. A light that goes out is one useful check, not the only evidence that the repair worked.
Test the vehicle safely and check wheel-speed data
Only test-drive when the vehicle is fully reassembled and the brakes feel normal. Choose a safe, low-traffic area and follow the manual’s verification procedure; do not provoke an ABS stop on public roads. If appropriate, use a scan tool to compare wheel-speed readings under the conditions specified by the service information. Stop if the warning returns, a reading drops out, or braking feels unusual.
Know when persistent faults call for professional diagnosis
A fault that returns after a correct installation may point to wiring damage, a tone-ring or bearing issue, a connector problem, or another ABS-system fault. Professional diagnosis is appropriate if you cannot safely access the sensor, the old part is seized or broken, or the scan data remains unclear. If the vehicle’s braking performance has changed, avoid driving it until it has been inspected.
Conclusion
A careful ABS sensor replacement starts with diagnosis, not guesswork, and ends with a verified repair. Confirm the fault, use the correct part and vehicle-specific procedure, protect the wiring during installation, and do not hesitate to seek help when the evidence points beyond the sensor.
Frequently Asked Questions
Can I replace an ABS sensor myself?
Often, yes, if the sensor is accessible, the correct part and procedure are known, and you can support the vehicle safely. Some designs require hub removal or specialized tools, which may make professional service the better choice.
How do I know which ABS sensor is faulty?
Read ABS-specific codes, compare wheel-speed data where appropriate, and inspect the suspected sensor circuit and nearby components. A code can identify an affected circuit or wheel, but it does not always prove the sensor itself has failed.
Will a basic code reader diagnose an ABS sensor?
Not necessarily. Many basic readers access engine codes only, so you may need a scan tool that can communicate with the ABS module and display its codes or live data.
Do I need to replace the hub with the ABS sensor?
That depends on the vehicle’s design. Some sensors are serviced separately, while others are integrated into or accessed through a hub or bearing assembly; check the parts information and repair procedure for your vehicle.
Can I drive with the ABS warning light on?
The vehicle may still have conventional braking, but ABS or related stability functions may be limited or unavailable. Follow the owner’s manual, avoid unnecessary driving, and do not drive if braking feels abnormal or unsafe.
Does the ABS warning light reset automatically after replacement?
It may go out after the fault is corrected, but stored codes can require clearing with an ABS-compatible scan tool. The prescribed startup or drive conditions also vary by vehicle.
What should I do if the ABS code returns after replacement?
Recheck the connector, harness routing, sensor seating, and nearby tone ring or bearing, then review the returning code and live data. If the cause is still unclear or the warning persists, arrange professional diagnosis rather than repeatedly clearing the code.