

Key Takeaways
An ABS light that appears after wheel bearing work usually points to a disturbed sensor, encoder ring, wiring path, or installation detail rather than a mysterious electronic failure.
- Inspect the wheel speed sensor, connector, wiring, and encoder ring first.
- Use an ABS-capable scan tool instead of relying only on a basic engine-code reader.
- Compare live wheel speed data to identify an intermittent or missing signal.
- Confirm the bearing orientation, sensor air gap, and specified torque.
- Reset the warning only after the underlying fault has been repaired.
Why the ABS light comes on after wheel bearing replacement
When the abs light on after wheel bearing replacement appears, the timing is useful evidence. The wheel bearing sits close to the parts that measure wheel rotation, so removal and installation can disturb a sensor or its signal path. The warning may come on immediately, or only once the vehicle begins moving and the control module compares wheel speeds.
How the wheel bearing and ABS system are connected
A wheel bearing or hub assembly may sit beside a wheel speed sensor and an encoder ring. Depending on the vehicle, the ring is built into the bearing or hub, while the sensor reads its changing magnetic or mechanical pattern. If those components are not positioned correctly, the ABS module can receive a signal that is weak, irregular, or absent.
The bearing itself does not usually “turn on” the warning light. More often, the replacement changes the distance, orientation, or condition of the parts that the sensor reads. That is why checking the bearing and sensor as one assembly is more productive than treating them as unrelated repairs.
Why wheel speed sensor signals matter
The ABS module uses wheel speed information to detect differences in rotation during braking and, on many vehicles, during traction or stability-control events. A single wheel reporting an implausible speed can trigger an ABS fault even when the ordinary hydraulic brakes still feel normal.
A signal problem may be constant, or it may appear only while the wheel turns. This distinction matters: a stationary resistance test can look acceptable while live data reveals a dropout on the road or on a lift. A scan that can communicate with the ABS module is therefore more useful than a reader that checks only the engine computer.
Common installation-related causes
Wheel bearing work often requires the sensor to be moved, the harness to be unclipped, or the hub to be pressed or bolted into place. A small nick in the cable, a sensor that is not fully seated, or an encoder ring facing the wrong direction can be enough to set a code.
For a useful overview of post-repair causes and reset methods, see this ABS warning light guide. It is best used as background alongside the vehicle’s service information, because sensor design and reset procedures vary by model.
When the warning light indicates a separate fault
The repair may be coincidental if the ABS light was present before the bearing replacement, if another wheel has an older sensor fault, or if the vehicle has a separate voltage or communication issue. A scan code that points to a different corner of the vehicle should not be forced into a bearing-related explanation.
Record which lights appeared, when they appeared, and whether the vehicle was moving. That simple timeline helps separate an installation fault from a pre-existing problem and prevents unnecessary replacement of otherwise good parts.
The most common causes to check first
The fastest first checks are usually physical. Look at the wheel where the work was completed, compare it with the opposite side, and avoid assuming that a new bearing guarantees a correct ABS reading. A careful inspection can reveal a loose plug or trapped wire before more involved testing begins.
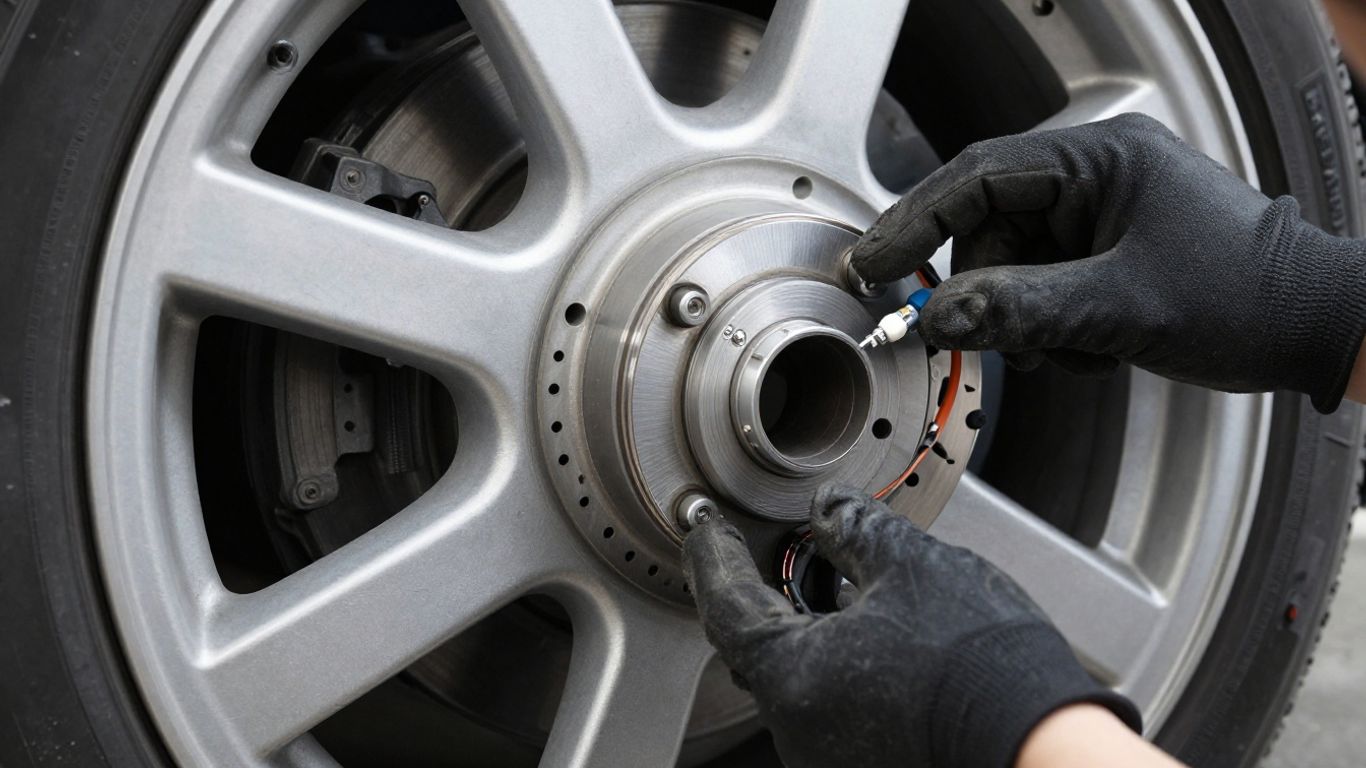
A damaged or disconnected ABS sensor
The sensor can be bumped, pulled, cracked, or left partly disconnected during removal. Its connector may look attached while a terminal has backed out, or the cable may be stretched enough to fail when the suspension moves.
Check the sensor body, locking tab, connector seal, and the full visible length of the harness. Do not pull on the wire to test whether the plug is secure; release the connector and inspect it properly.
Incorrect sensor placement or air gap
A sensor that is not fully seated can sit too far from the encoder ring. Rust beneath its mounting flange, a damaged bore, or a bent bracket can also change the air gap and weaken the signal.
The correct gap is vehicle-specific, so use the manufacturer’s specification rather than a universal measurement. If the sensor was removed, clean the mounting surface and confirm that it sits squarely without forcing it into place.
A missing, damaged, or reversed encoder ring
Some replacement bearings have an encoder ring on only one side. If the bearing is reversed, the sensor may face a plain seal rather than the encoded surface. A ring can also be damaged during pressing or contaminated by metallic debris.
Verify the replacement part number and orientation against the service information. A bearing that physically fits is not necessarily the correct ABS-compatible bearing for that application.
Wiring routed too close to moving parts
The harness must follow its original clips and clear the tyre, brake rotor, axle, and suspension movement. A wire that rubs intermittently may produce a fault only over bumps or while steering.
Use the vehicle’s normal suspension travel as a guide during inspection, but never place hands near rotating parts. Repair or replace damaged wiring rather than wrapping a serious break and returning the vehicle to service.
Debris or corrosion near the sensor
Rust flakes, dirt, grease, or a damaged mounting surface can hold the sensor away from the encoder ring. Debris on the reading surface can also interfere with the signal, especially when the repair area was exposed during disassembly.
Clean carefully with materials suitable for the sensor and surrounding parts. Do not scrape aggressively or use a solvent that can damage seals, plastic, or insulation. After cleaning, check that the sensor remains firmly seated.
How to diagnose the ABS warning light
Diagnosis should move from evidence to testing, not from guesswork to parts replacement. Begin with the warning-light timeline and the wheel where work was performed, then confirm the fault using the ABS module’s own data. The following table helps match common findings with sensible next checks.
Scan the ABS control module for fault codes
Connect a scan tool that can access the ABS control module and record current, stored, and history codes before clearing anything. The code may identify a wheel circuit, an implausible signal, or a communication problem, but it is not automatically proof that the sensor itself is bad.
| Finding | What it may suggest | Useful next check |
|---|---|---|
| Wheel-specific circuit code | Open, short, connector, or sensor issue | Inspect the harness and terminals |
| Missing wheel speed signal | Sensor, encoder ring, air gap, or wiring fault | Compare live wheel speeds |
| Implausible speed reading | Weak, intermittent, or incorrect signal | Check orientation and sensor seating |
| Communication or voltage code | Power, ground, or module issue | Test system voltage and connections |
The table is a starting point, not a parts-ordering list. Follow the code’s test procedure and compare its result with what can be seen at the wheel.
Compare live wheel speed data
Live data is particularly helpful when the light appears only after driving. With the vehicle safely supported or during a controlled road test, compare the four wheel-speed readings as they rise and fall. One reading that remains at zero or drops out while the others agree gives the investigation a clear direction.
Do not spin a wheel by hand and assume every active sensor will produce a useful reading in the same way. Sensor technology and scan-tool reporting differ, so interpret the data using the vehicle’s repair information.
Inspect the sensor and wiring visually
Follow the harness from the sensor to its body connector. Look for pinched insulation, fresh scrape marks, loose clips, water entry, or a connector that was not fully latched after the bearing was installed.
A visual check is strongest when it is comparative. The untouched side can show the expected clip positions, wire slack, sensor angle, and connector routing. Photographing the area before disassembly can also help if the harness has been disturbed.
Test sensor resistance and voltage
Electrical tests depend on whether the vehicle uses a passive or active sensor. Some sensors can be checked for resistance, while others require a supply-voltage check and a signal test. Never apply a generic resistance specification to a sensor type that the vehicle does not use.
Use a wiring diagram and the manufacturer’s values. If the wiring tests correctly at the connector but live data remains wrong, the sensor, encoder ring, air gap, or control-module input needs closer examination.
Check the wheel bearing installation
If the sensor and harness appear sound, revisit the bearing installation. Confirm that the part matches the vehicle, the encoder side faces the sensor, the bearing is fully seated, and the axle or hub fasteners were tightened in the correct sequence.
A helpful technical discussion of sensor supply checks and ABS diagnosis can be found in this wheel bearing troubleshooting thread. Treat model-specific details there as examples, not universal instructions.
How to fix the underlying problem
The repair should address the failed test, not merely erase the warning. If a connector is damaged, repair the connector; if the bearing is reversed, correct its orientation; if the signal is missing because the sensor is broken, replace the sensor with the correct part. Photograph the original routing before removing anything further.
Repair damaged wiring and connectors
A harness with cut insulation, broken conductors, loose terminals, or heat damage should be repaired using the correct automotive repair method or replaced as specified. Keep repaired sections sealed and supported so they do not flex against a moving component.
After the repair, tug gently on the connector body rather than the wire and confirm that the locking mechanism is engaged. Then move the suspension and steering through their normal range while checking for tension or contact.
Reinstall or replace the ABS sensor
Remove the sensor only after checking how it is retained and whether corrosion is holding it in place. Clean the bore, inspect the sensor tip, and reinstall it squarely. If the housing is cracked or the signal remains faulty after wiring checks, replacement may be appropriate.
Do not hammer a sensor into position or alter its tip to change the air gap. The correct replacement must match the vehicle’s connector, mounting style, and electrical design.
Correct the encoder ring or bearing orientation
A directional encoder ring must face the sensor. If the bearing has been installed backward, it may need to be removed and replaced rather than turned around in place. Pressing forces applied to the wrong race can also damage the new bearing or its encoder.
Verify the orientation before final assembly. A guide covering wheel hub ABS fixes discusses several related checks, including sensor seating, wiring, part verification, and encoder-ring concerns.
Clean rust and debris from the mounting area
Remove corrosion from the sensor seat and bearing mounting face using an appropriate method that does not damage the surfaces. The goal is a flat, clean fit, not the removal of large amounts of metal.
Keep abrasive material away from the encoder ring and sensor opening. Once clean, assemble the parts carefully and check that the sensor does not rock or sit visibly proud of its mounting surface.
Torque the wheel bearing and related components correctly
Use the vehicle’s specified torque and tightening procedure for the axle nut, hub bolts, and bearing fasteners. Some applications require a particular sequence, a new nut, or a final angle measurement, so a general torque value is not safe to substitute.
Incorrect clamping can create play, noise, or a changing sensor gap. After tightening, check for abnormal movement according to the service procedure and make sure the wheel rotates without contacting the harness or brake components.
How to reset the ABS light after the repair
Resetting is the final step, not the diagnosis. Some vehicles extinguish the light after the module sees a valid signal, while others retain a stored code until it is cleared with suitable equipment. The safest approach is to repair, rescan, and confirm that the original fault does not return.
Clear the code with an ABS-capable scan tool
Use a scan tool that can communicate with the ABS module and clear its codes. A basic engine-code reader may not see or erase an ABS fault. Save the original code first, clear it after repair, and rescan to confirm the module reports no active problem.
If the code will not clear with the vehicle stationary, that does not always mean the repair failed. Some faults are validated only when the vehicle moves and the module receives wheel-speed data.
Complete a battery reset when appropriate
Disconnecting the battery is not a universal reset method and may erase useful information or require other systems to relearn settings. It can also fail to remove a code stored in the ABS module.
Follow the vehicle-specific procedure before considering a battery reset. If the manufacturer does not recommend it, use an ABS-capable scan tool instead and preserve the diagnostic evidence.
Drive the vehicle through a relearn cycle
After clearing the code, drive in a safe area under the conditions specified for the vehicle. The module may need to see all wheels turning at a plausible speed before it confirms that the repair worked.
Begin slowly, check that the warning lights behave normally, and stop if braking, steering, or vehicle stability feels unusual. A relearn drive is confirmation, not a substitute for repairing a damaged sensor or bearing.
Understand when the light should turn off automatically
Some systems switch the light off after a short drive when the signal becomes valid. Others keep the light illuminated until the code is cleared, even though the fault is no longer present.
The owner’s manual or service information should settle that question for the specific model. If the light remains on after a correct repair and a suitable drive cycle, return to the stored code and live data rather than repeatedly cycling the ignition.
Avoid resetting the light without fixing the fault
Clearing a warning without correcting the cause can hide a loss of ABS, traction control, or related functions. It also removes information that could make the eventual diagnosis faster.
A reset is useful only when it follows a verified repair. If the warning comes back, treat that recurrence as new evidence and continue testing the sensor circuit, encoder ring, bearing fit, and module communication.
When to seek professional diagnosis
A post-repair ABS warning is sometimes a straightforward connector or orientation issue, but the system is safety-related and can involve manufacturer-specific procedures. Professional help is sensible when the fault cannot be reproduced, multiple systems are affected, or the required tests involve live braking or stability-control data.
The ABS light returns immediately
If the light comes back as soon as the ignition is switched on, the module may be detecting an electrical fault before the wheels move. If it returns only after driving, suspect a signal, air-gap, encoder, or bearing-play issue.
Either pattern deserves a code scan rather than repeated resets. Bring the original scan results and details of the bearing repair so the technician can start with a useful timeline.
Multiple dashboard warning lights appear
ABS, traction-control, stability-control, and brake warnings may share wheel-speed information or power and communication circuits. Several lights together can point beyond the replaced bearing.
Do not assume that every warning is a separate failure. A full vehicle scan can show whether one underlying fault is affecting multiple modules.
The vehicle pulls, vibrates, or makes noise
Pulling, grinding, humming, steering vibration, or unusual wheel play raises the priority of the inspection. These symptoms may indicate a mechanical installation problem as well as an ABS signal fault.
Avoid extended driving until the wheel, bearing, brake components, and fasteners have been checked. An ABS warning paired with a new mechanical symptom should not be treated as a harmless dashboard issue.
Brake performance or traction control is affected
A lit ABS warning can mean that anti-lock braking or electronic stability functions are unavailable, even if the conventional brakes still operate. A change in pedal feel, braking direction, or traction-control behavior requires prompt attention.
Drive only as necessary and under controlled conditions, or arrange a professional inspection. The correct response depends on the warning combination and the vehicle’s operating condition.
The correct repair requires manufacturer-specific equipment
Some vehicles need a particular scan tool, calibration routine, wiring diagram, or encoder-signal test. If the available equipment cannot access the ABS module or display reliable wheel-speed data, further home testing may create more confusion.
A qualified technician can verify the repair, complete any required relearn, and check related systems. That is especially valuable when the warning remains after the visible sensor and wiring checks have passed.
Conclusion
An ABS light after wheel bearing replacement is usually a clue that the sensor, encoder ring, wiring, air gap, or bearing installation needs another look. Scan the ABS module, compare wheel-speed data, correct the physical fault, and then complete the model-specific reset or relearn procedure. If warning lights or driving symptoms persist, have the vehicle diagnosed before returning to normal use.
Frequently Asked Questions
Can a new wheel bearing cause the ABS light to come on?
Yes. The bearing or hub may include an encoder ring, and installation can disturb the nearby sensor, wiring, or air gap. A reversed or incorrect bearing can also produce an invalid wheel-speed signal.
Will the ABS light turn off by itself after replacing the bearing?
Some vehicles turn the light off after the module detects a valid signal during a drive cycle. Others require the stored code to be cleared with an ABS-capable scan tool, so the exact behavior varies.
Can I use a normal OBD2 reader to reset the ABS light?
Many basic readers communicate only with the engine-control system and cannot access ABS codes. Use equipment that specifically supports the vehicle’s ABS module and reset functions.
What should I check first after the repair?
Inspect the sensor connector, sensor seating, visible wiring, encoder-ring orientation, and the bearing part number. These checks are especially useful when the warning appeared immediately after the work.
Is it safe to drive with the ABS light on?
The ordinary brakes may still work, but anti-lock braking and related stability functions may be unavailable. Drive cautiously only when necessary and arrange diagnosis promptly, particularly if other warning lights appear.
Why does the light appear only when I start driving?
The module may not be able to verify wheel-speed signals until the wheels rotate. A signal that is missing, intermittent, or inconsistent with the other wheels can trigger the warning once movement begins.
Can a loose bearing trigger an ABS warning?
Yes. Excessive play can change the sensor-to-encoder relationship and create an erratic wheel-speed signal. Mechanical looseness also presents a safety concern and should be checked using the vehicle’s specified procedure.